Shopify Setup.
From install to live assistant in under ten minutes. No code changes to your theme files.
Connect your Shopify Store
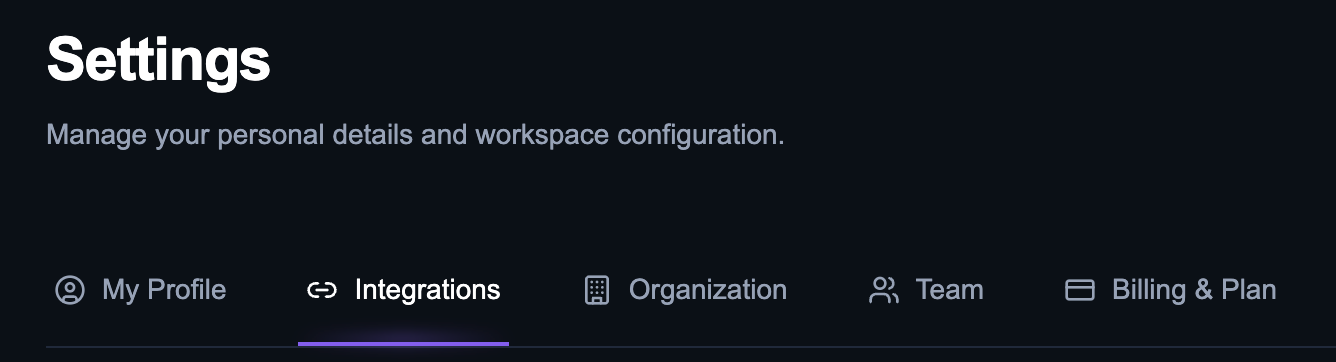
Open the Integrations tab
Inside your Zavtra dashboard, navigate to Settings and open the Integrations tab.
Enter your store domain
Find the Shopify integration card, enter your store's .myshopify.com domain, and click Connect.

Install the Zavtra app
You will be redirected to your Shopify admin. Review the required permissions and click Install app.
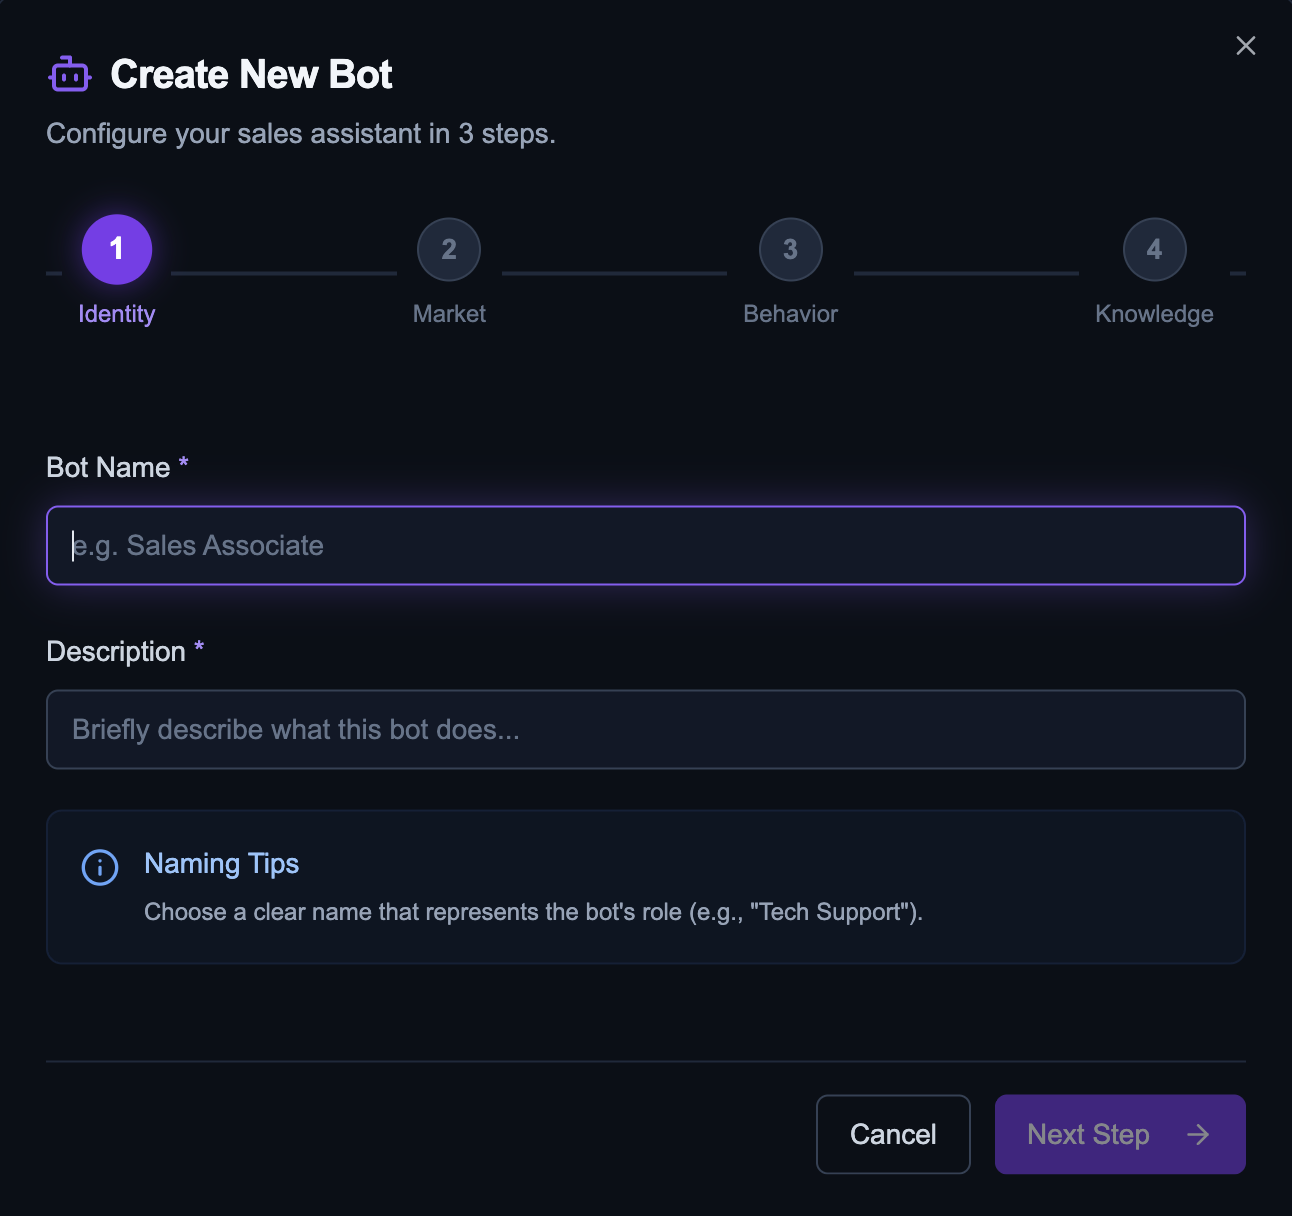
Set up your assistant
Once redirected back to Zavtra, a setup wizard will guide you through naming your assistant and configuring its initial settings across four quick steps.
Sync your product catalog
Visit the Integrations tab and click Sync catalog. Zavtra will pull your full Shopify inventory and keep it up to date automatically.
Activate the widget
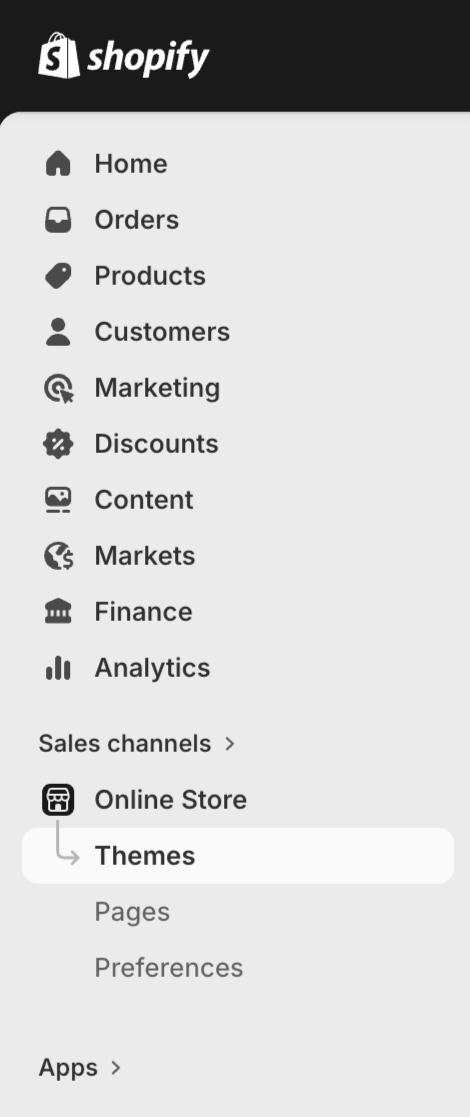
Go to Online Store in your Shopify admin
In your Shopify admin sidebar, open Online Store and click Themes.
Customize your theme
On your current theme, click Edit theme to open the theme editor.

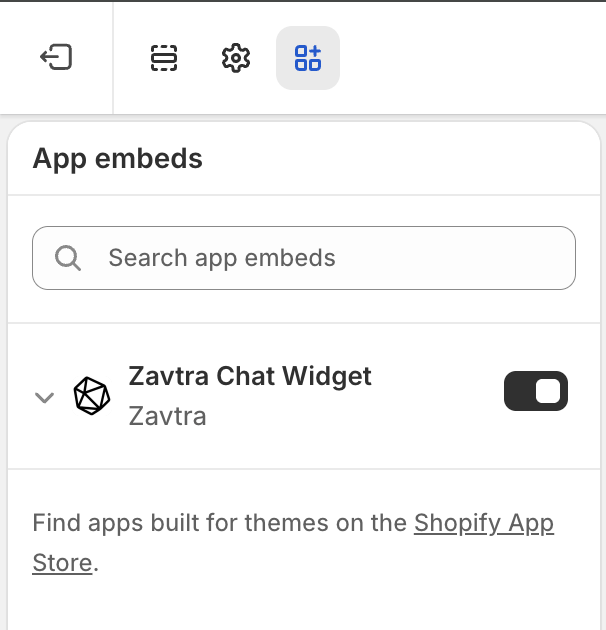
Enable Zavtra Widget
Open App embeds Find Zavtra Chat Widget, switch the toggle to ON.
Save
Click Save in the top right. The widget is now live on all pages of your storefront.

Train your assistant
Upload your store documents
Upload product guides, size charts, return policies, or brand FAQs under the Documents tab. Zavtra uses these to answer customer questions accurately.
Test before going live
Use the Sandbox preview in your dashboard to ask your assistant questions about products or policies. Once you are happy with the responses, your widget is already live on your storefront.
Need help with setup?
Book a quick call and I will personally help you get Zavtra running on your store.
Book a Setup Call